
From Awkward Room to Epic Play Space: How I Created a Stylish Indoor Tennis Court for My Kids—and Boosted My Home’s Value

Christy Thames, an Advisory Board Member for the Tulsa Foundation for Architecture, advocates that great design can be timeless and yet still have room to evolve.
Whatever your home’s style, the way you utilize space can make all the difference in how you enjoy your investment. Thames: “Take time to access, reflect, honor, and create opportunity for spaces well lived and loved. There is so much reward in the marriage of good design, function, and materiality.”
We all have that room—the one that’s supposed to be something amazing but ends up as a glorified storage space or a dumping ground for… well, everything.
For me, it was a small, awkward room just off the kitchen. Maybe it was originally intended to be a mudroom or a cozy breakfast nook. Over the years, I tried countless iterations—different lighting, rugs, furniture arrangements—you name it. But no matter what I did, it never quite clicked.
Instead, it became the space where everything landed: bags and shoes carried in from the back door, boxes destined for donation, forgotten dog toys, and outgrown kid clutter. It was the room I would shoo my children into while pulling hot food from the oven, convincing them it was a “play space” so I could cook in peace and keep them at a safe distance from the stove—and my sanity.
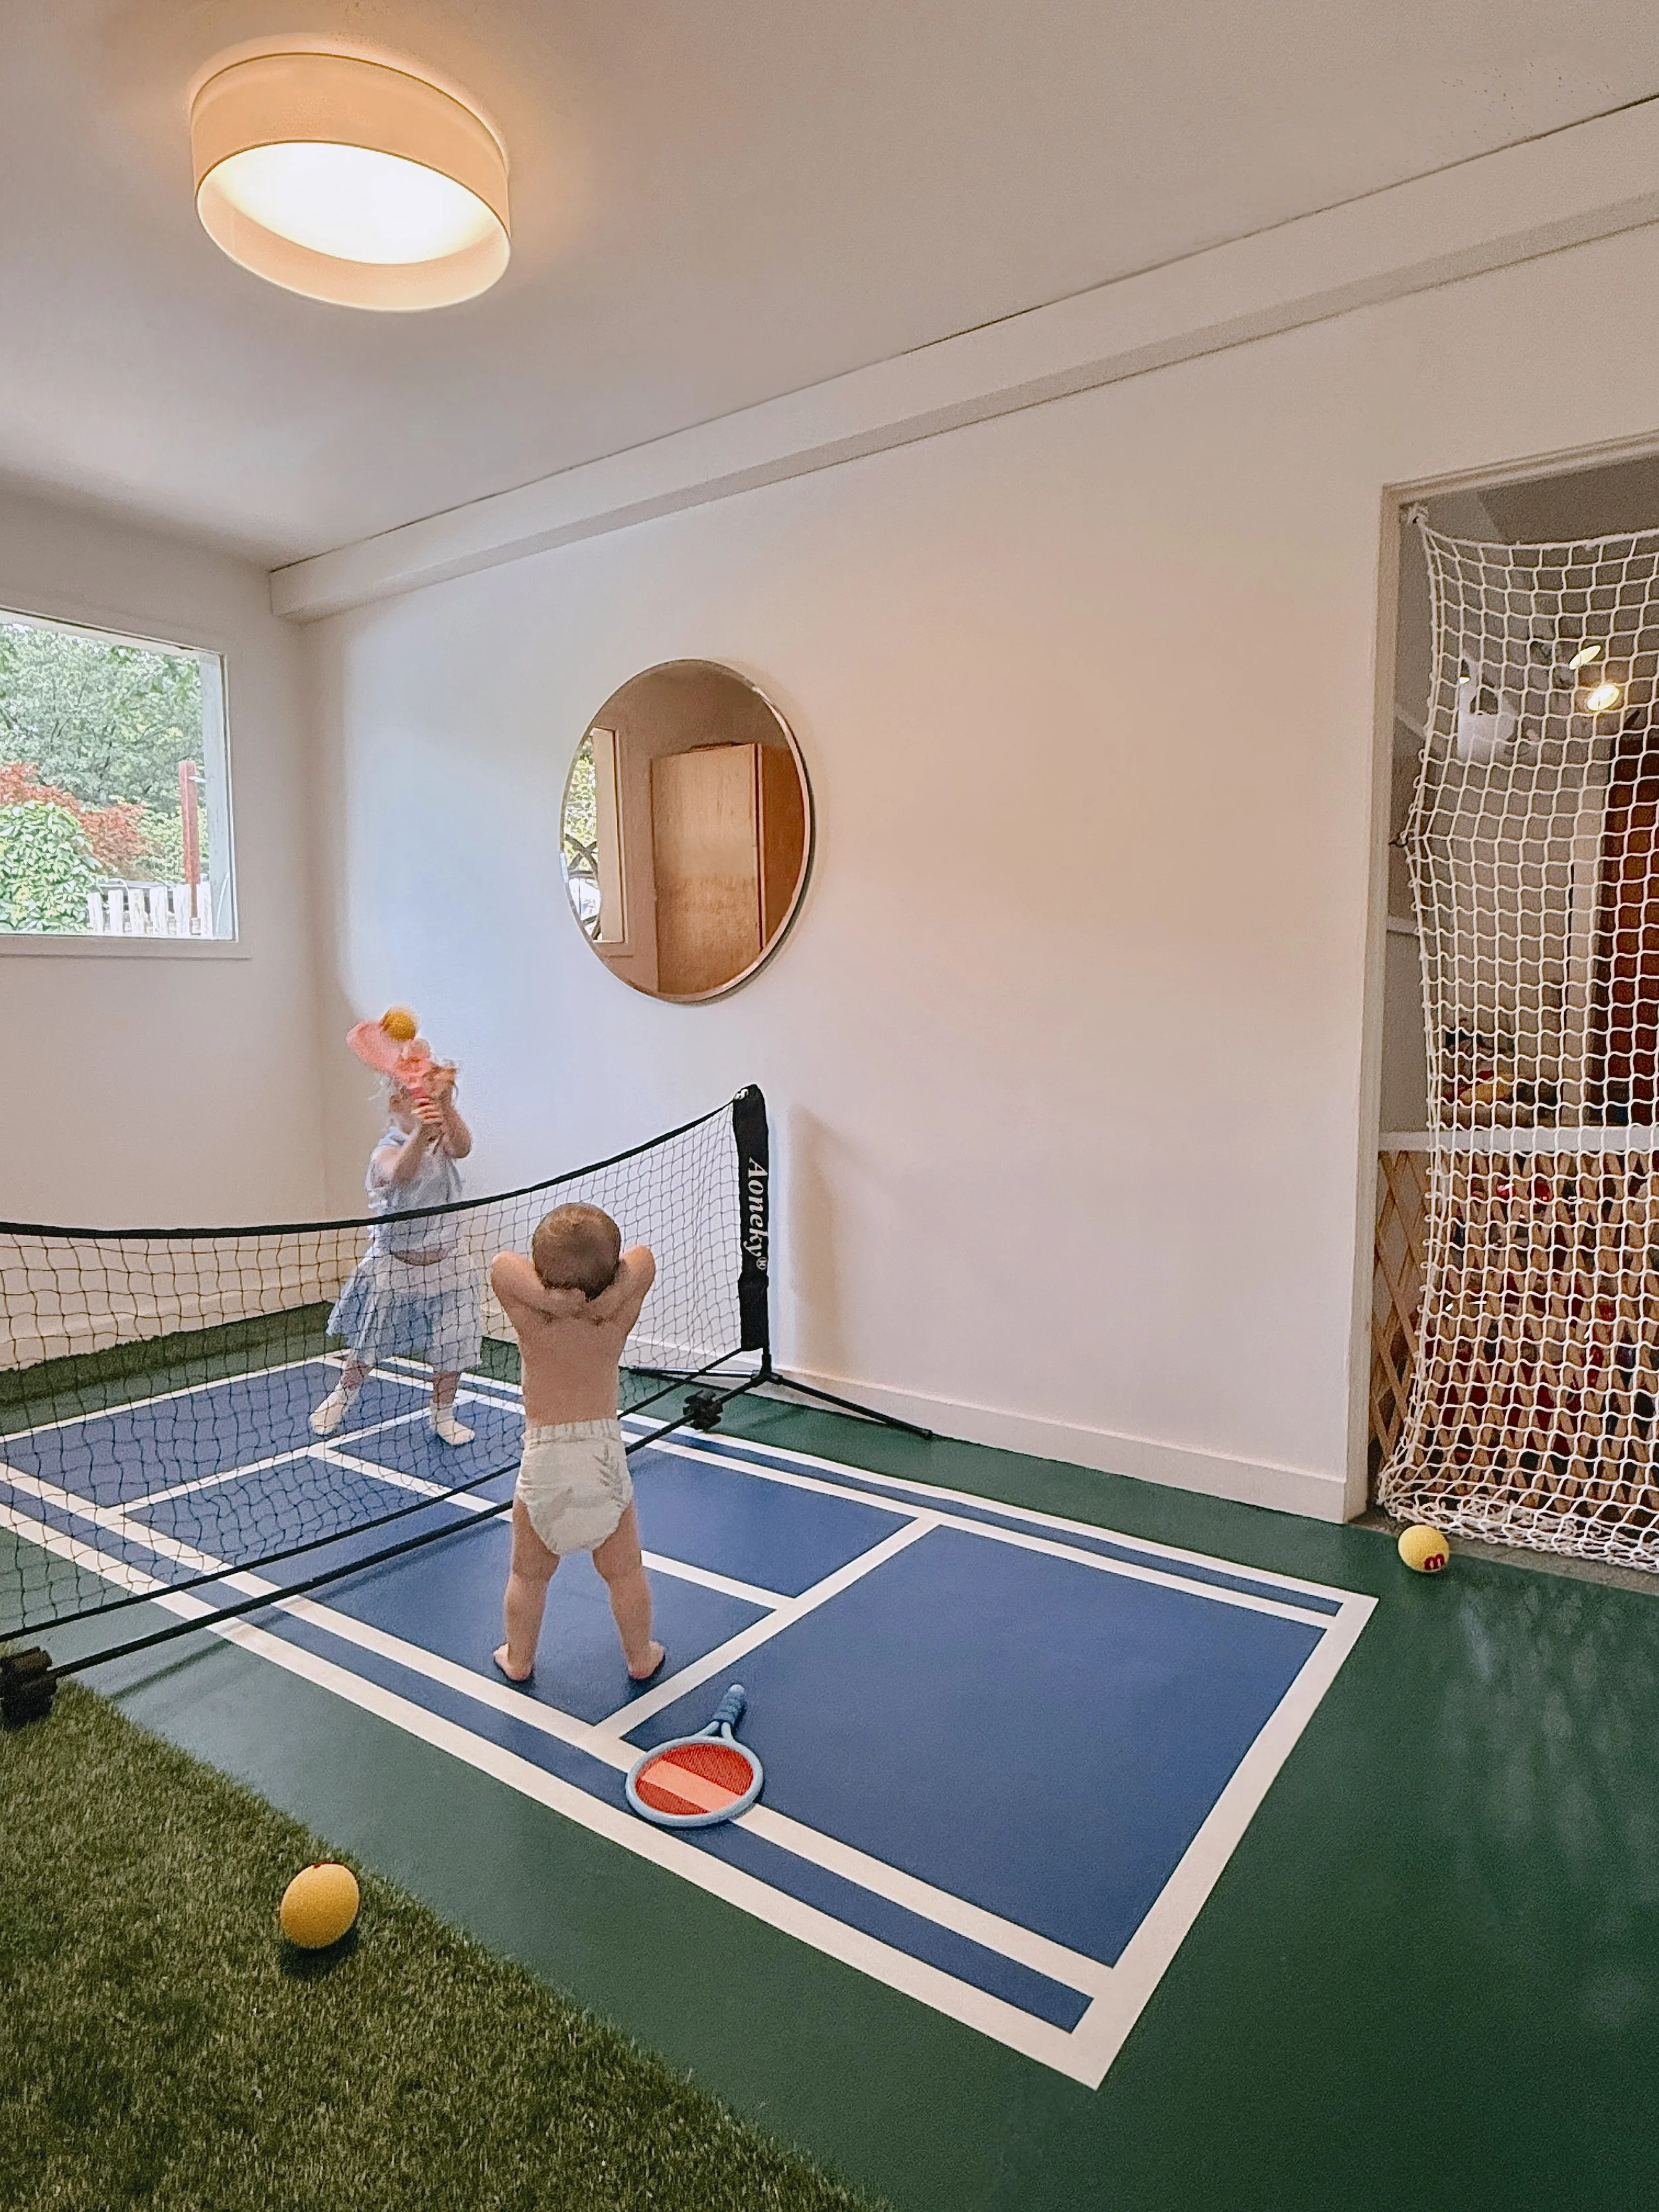
Pictured: The Thames family kids test out their new mini indoor tennis court.
Project located in Tulsa, Oklahoma. Completed 2025.
But then, one afternoon I observed my 1 year old playing ball with our dog. My son would always carry the ball back to this room. I noticed he was actually bouncing the ball on the floor. Our dog would be so lucky to get some playtime if she snagged the ball between his rouge throws. I realized then it was the room he liked. I too often complained it was too small to function for my big renovation plans. But for my children, the small size of the room gave them a chance to play in a way the oversized game room did not. Here, in this awkward room, my son was able to contain the ball easier between the close quarters of the nearby walls. In this moment, inspiration struck.
My two toddlers love to play ball, wrestle, and dance. My oldest had just started tennis lessons, and the Oklahoma summer heat was creeping in—meaning less outdoor playtime and more indoor chaos. As a busy mom juggling a business, managing seasonal design projects (including my own ongoing renovations), and supporting my kids’ after-school enrichment activities, I had a lightbulb moment:
What if I turned that sad, underused room into a mini indoor tennis court? Yes, you read that right. A tennis court. Inside.
And the best part? It turned out to be an easy, affordable, and totally DIY-friendly project. Even better, I didn’t have to wait for contractor availability or squeeze this transformation into someone else’s schedule for lack of specialized skillsets, heavy lifting, etc. I would do it, quick, and beg for forgiveness from my husband if it was a flop. This is the kind of transformation I live for—taking a forgotten or awkward space and turning it into something beautiful, functional, and fun. I convinced myself to trust my gut, I had been known to design spaces that are totally original and timeless, and like my projects of the past this was totally original.
It’s also the kind of upgrade that adds real value to a home. Whether you’re preparing to sell, thinking about future resale, or simply looking to enhance your family’s day-to-day life, a creative and intentional use of space can make all the difference.
The Design & The Dream
First, I had to truly visualize the potential of the space. I grabbed some paper and started sketching. The room was small, so a full-sized court was out of the question. My vision was a scaled-down version—think pickleball court, but a little smaller. It would be perfect for practicing volleys, serves, and general racquet skills—assuming you’re a pint-sized three feet tall, of course. With a smart layout, I realized I could probably install a kid-sized basketball hoop in there too.
I briefly reconsidered hiring a contractor, but the quotes were astronomical and the project timelines didn’t align with our schedule. Determined to stay within budget, I committed to taking on the renovation myself. That meant designing with both practicality and flexibility in mind—for my family and our constantly evolving list of activities.
No matter how the space would be used in the future, I wanted to ensure that my material choices and installation methods were adaptable and multigenerational. Even the smallest investments had to be done right, especially if I was going to resist the temptation of building my over designed, very costly, of course, VERY dreamy butler’s pantry....yes I had another iteration in mind for the space but this one will just have to wait. Luckily for the budget, timeline, and sanity the choice for this indoor tennis court absolutely proved to be the best choice for the space!
Key design considerations:
Safety: This was paramount. No hard surfaces nearby. Everything needed to be kid-proof.
Durability: The space needed to withstand constant use and errant tennis balls.
Budget: I set a firm limit and was determined to stick to it.
Aesthetics: It had to be fun, engaging, and (dare I say it?) stylish!
DIY Magic: Budget-Friendly & Brilliant
-
I opted for high-quality padded sports flooring to create a safe, functional, and visually appealing space. It was definitely my “splurge” item for the entire project, coming in at a total flooring cost of still just $525 all-inclusive. After researching several companies online for sports flooring, I was thrilled to discover an American manufacturer based in California that offered the bold, vibrant colors I envisioned for my design. Even better—they were willing to sell smaller rolls directly to consumers. Their customer service team guided me to the fastest delivery option, and I was able to place the order conveniently through Amazon. (Woohoo!) I’ll include links to the flooring and other recommended products on our Amazon Storefront at the end of this article.
If you’re looking for a more budget-friendly option, consider interlocking foam tiles. They’re soft, safe, easy to install, and offer a great alternative for home sport courts.
For my project, shock absorption was non-negotiable—especially with energetic kids and high-impact play. I selected a two-tone court design and carefully measured the square footage needed in each color before placing my order. I even caught a sale on the blue flooring!
This flooring system protects underlying surfaces—perfect for my space, which had a painted concrete slab—and doesn’t require professional installation. I used heavy-duty, double-sided floor mat tape to secure the rolls in place.
To finish the court, I added crisp white boundary lines using a professional-grade sport floor tape—another great find on Amazon.
I then covered the remaining slab floor around the court with an artificial grass turf, remnants from another project I completed outdoors prior to the start of this one. You can follow my Adventures in Landscape Design: A DIY Artificial Grass Home Improvement Project -coming soon to OwnTulsa Culture Highlights. I wanted the turf to give the impression of a real outdoor tennis court with a sort-of sideline guest viewing zone (my favorite place to watch the kid’s try their hand at a tennis match).
-
To prevent wall damage and prioritize safety, I plan to install padded wall panels wrapped in durable, wipeable fabric. For now, though, I opted to keep things simple by adding a playful oversized pink mirror (currently out of stock but have shared a few other beautiful options such as this violet one; gold framed round mirror, or a fun iridescent window film) and leaving the plaster walls bare. The mirror reflects natural light from the nearby window, instantly making the space feel brighter and more spacious.
I made sure to hang it high enough to avoid little heads during playtime, while still placing it at a convenient height for my husband and me to do a quick outfit check before heading out the back door. I painted the walls in our home’s signature interior color—White Dove by Benjamin Moore—a soft, timeless white that complements the overall design aesthetic.
The space feels fun and vibrant for the kids without sacrificing the cohesive style of the home. If you’re looking to make a bolder statement, consider experimenting with cheerful hues like buttery yellow or coastal coral. Both add warmth and personality while keeping the vibe fresh and inviting.
-
The smallest and simplest update to the room, which I would argue has just as large an impact on the final look, was trading out the old ceiling light fixture. I opted for something appropriately proportioned to the space and that did not overpower the lighting needs.
Considerations
scale mattered - I traded out a trendy and too large chandelier (love this affordable chandelier option but it was totally wrong for this space) and opted for a flush mount fixture that would fit within the site line of the window when looking in from the outside in;
intensity and color/kelvins - I wanted to compliment the amount of natural light entering the room through the large window but not discredit the need for additional light on overcast days or in the evenings. Soft warm light was a must. Experience has taught me that when shopping for fixtures and/bulbs I almost always require the amount of Kelvins to be at least 2800 K. This will be sure your light is warm, and in the more orange-toned spectrum rather than on the opposite more cool toned spectrum. When shopping lightbulbs it can often be more challenging to find any below a neutral 3000K…but don’t give up, they are out there. I also immediately began my search for a fabric fixture or shade because I knew this would help with the acoustics as well as diffuse the light throughout the small space.
With a little effort I found this 20” Flush Mount Dimmable LED Ceiling Fixture and it was perfect! I often have to forgo any LED light for more traditional incandescent or other light sources because it can be hard to find LEDs with a low enough Kelvin temperature to truly be warm in color. But this one was a winner and it had options for color tine and could be set to a true 2800K light. Woohoo!
-
I was set on having a true tennis net. I wanted something designed specifically for toddler tennis practice. The height of the net was one important consideration. I also wanted a very specific width that would span the room and sit just outside the court lines in my design—just like a full-size tennis court.
It was also important to have enough space so the children and I could easily walk around the net and my family enter through the back door without having to take the entire thing down. I found an adjustable, portable style net system on Amazon designed for small tennis drills. It’s easy to remove if we ever need to repurpose the room. The adjustable height means that even as the kids get older, we can continue to use the same equipment.
For the pass throughs in/out of the room, I wanted to install nets to help contain the balls during a match. My design was to install some sort of a minimally visible wire along the ceiling line that would allow effortless use. When the room needed secured we would pull the net across the threshold and secure along the opposite wall by use of pre-installed hooks. Well, it worked like a charm and I highly recommend not skipping this feature if you are considering a similar project build. I found affordable sports netting and the perfect carabiner assisted hooks. The hooks were so perfect we ordered more to use for other needs around our property, indoors and out.
-
To round out the space, I invested in a set of small, soft tennis rackets, Wilson soft foam tennis balls, and a few birdies for some early badminton practice—because why not give the kids Mom’s full summer sports course right here in the room? I also added a corner net to neatly store all the gear when not in use, along with a simple dry-erase scoreboard. It’s a fun way to track progress and will eventually add a touch of friendly competition. I say “eventually” because, for now, they’re toddlers—and let’s be honest, the scoreboard serves more as a doodle pad than a stats tracker. But give it time!
When the kids are away….Moms get to play!
What used to be a forgotten room off our kitchen is now one of the most loved spots in our home—and it all came together in a single weekend for under $1,200! Instead of paying thousands for professional installation, we took a hands-on approach and created a mini indoor tennis court for our young kids (and let’s be honest—us, too!).
The space is versatile enough for yoga, spinning, or even a little roughhousing when the kids need to burn energy. I now find myself saying, “Take it to the court!”—and they do, with laughter and nonstop movement replacing screen time before dinner.
As a mom, design lover, and tennis enthusiast, this project checked every box: affordable, creative, and connection-building. Even better, it’s sparked new interests in physical activity and reduced our kids’ TV time.
Why tennis? That’s just what our family is into right now. But your project can reflect your passions—basketball, dance, crafting, whatever brings your household joy. The point is: think creatively about underused space. With a little vision and some DIY effort, you can create something truly unique and valuable.
Pro Tip: Do your research before starting. Planning ahead will save money, avoid mistakes, and make the process more rewarding. And remember, you can always bring in a designer or contractor if needed—Tulsa, my hometown, has some of the best talent around.
So grab a pen, sketch your vision, and start turning that extra room into something amazing. You’ve got this!

See more Behind The Design photos on our social media:


